
Canvas and layout
Zoom
Zoom in on small details, step back to see the whole page, and choose what the status bar along the bottom of the editor shows.
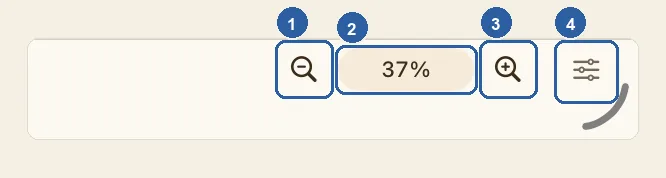
The status bar is the thin strip along the bottom of the editor. It shows the size of your page and, when they apply, the page number and what is selected. The zoom controls sit at its end.
How to zoom and set up the status bar
Find the zoom controls at the right end of the status bar. When Liwan Studio is in Arabic, they are at the left end.
In the picture at the top of this page, the numbers mark:
- The magnifier with a minus sign: zooms out.
- The zoom percentage: how large the page is shown now.
- The magnifier with a plus sign: zooms in.
- The sliders button: chooses what the bar shows (step 3).
The grid chip beside it is there only when Grid is turned on in step 3.
Tap the plus magnifier to get closer to a small detail, and the minus magnifier to step back. Each tap moves to the next size: 25, 33, 50, 67, 75, 100, 125, 150, 200, 300, 400, 600 and 800%. The middle of what you are looking at stays where it is.
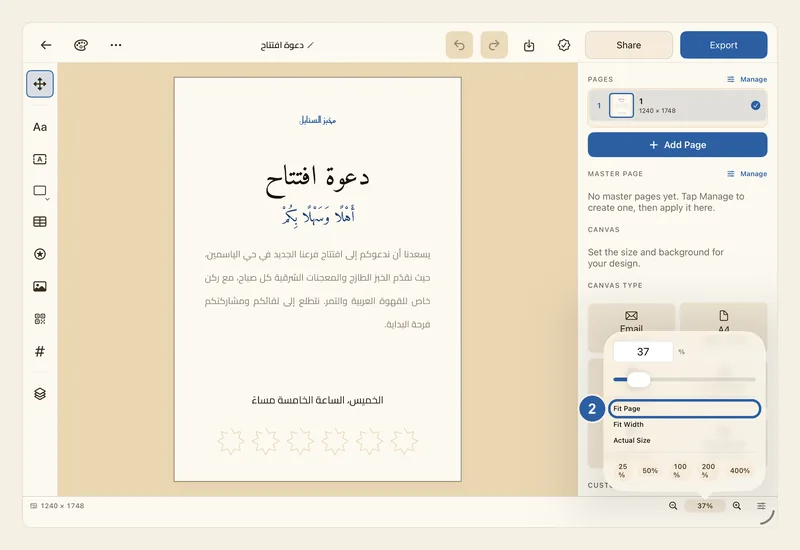
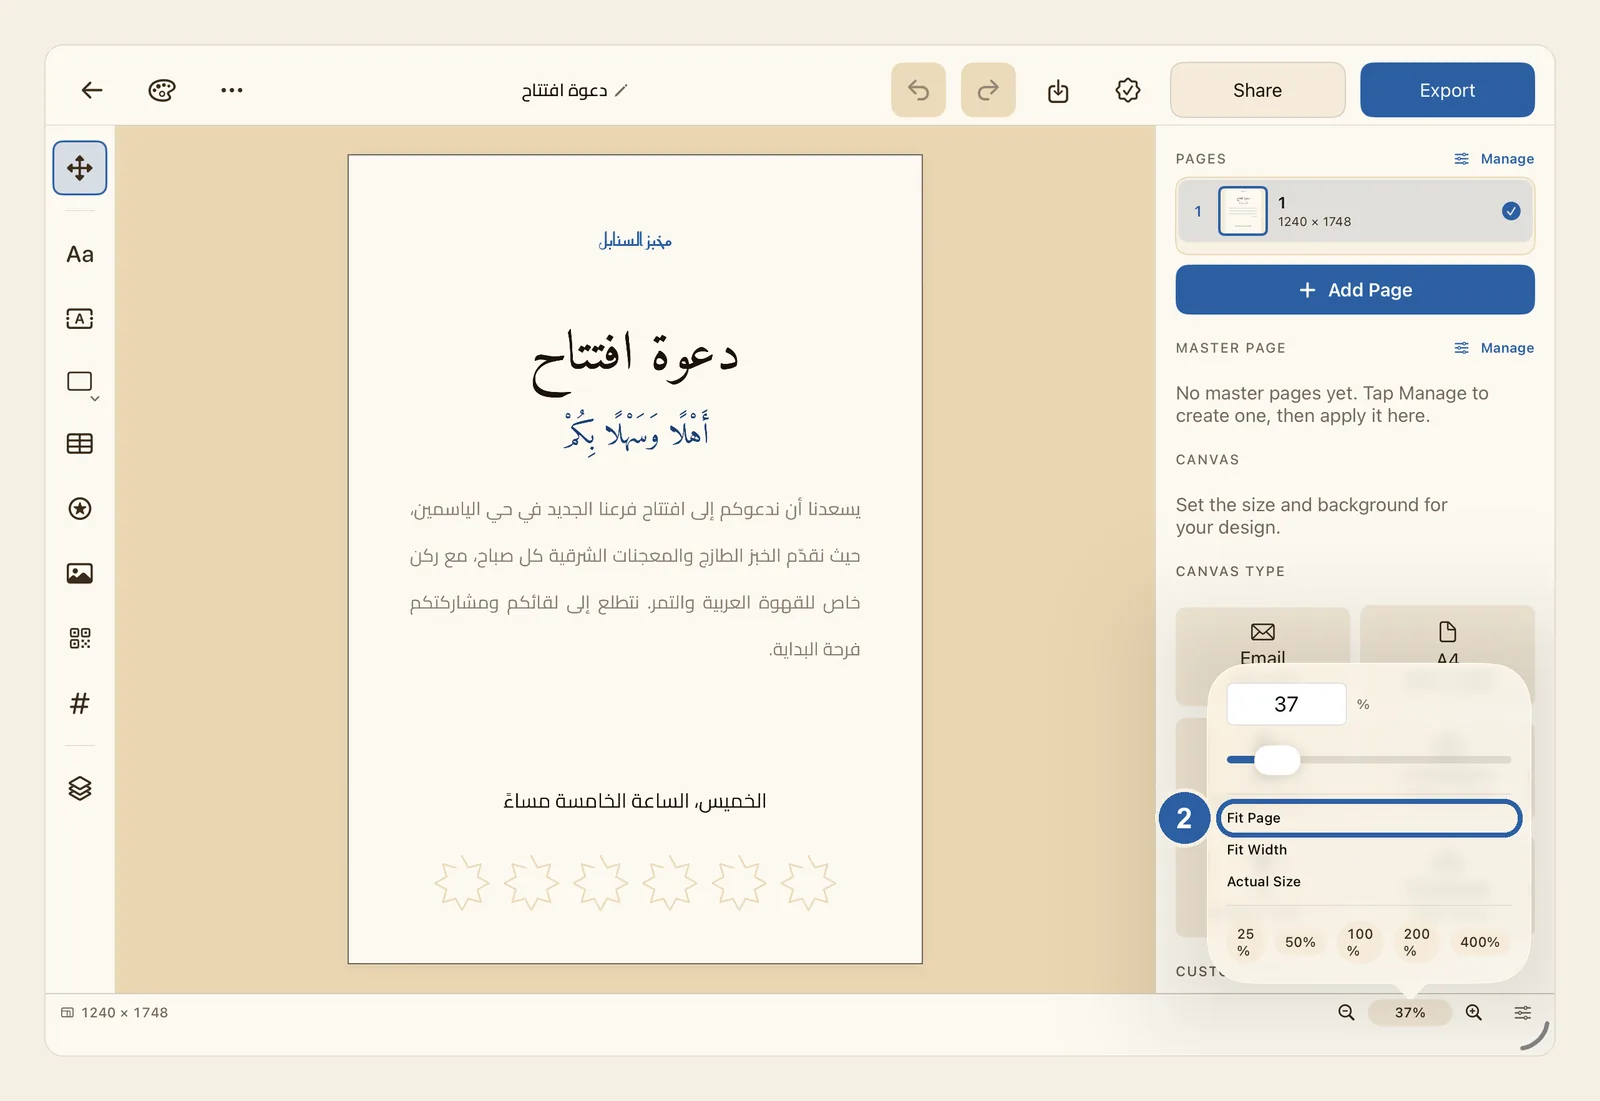
Tap the percentage. A small window opens above it:
- Fit Page shows the whole page and brings it back to the middle of the screen. Use it to get back when you have zoomed in a long way or lost sight of the page.
- Fit Width makes the page fill the width of the work area.
- Actual Size shows the page at 100%.
- The buttons along the bottom jump straight to 25%, 50%, 100%, 200% or 400%.
- Drag the slider for any size in between, or type a number in the box at the top and press Return. On iPad, tap the box first.
Fit Page, Fit Width, Actual Size and the size buttons close the window as soon as you tap them. A number you typed is also applied when you tap outside the window.
Tap the sliders button at the very end of the status bar. A list opens, with a tick next to each item the bar shows now. Tap an item to show or hide it:
- Page: for example "Page 2 of 8". It appears only in designs with more than one page.
- Canvas Size: the width and height of the page, such as 1240 × 1748.
- Selection: what is selected — the kind of object, such as "Text", or "3 selected" when you have selected several objects.
- Typography: shows "Editing text" while you type in a text box. Off at first.
- Grid: a chip with the grid spacing; tap it for the grid settings. Off at first. See Grid.
- Scrollbars (Mac only): adds scroll bars to the work area. On at first.
Tap Restore Defaults to go back to the starting set.
Tips
- Pinch with two fingers on the page, or on a trackpad, to zoom in or out around your fingers. Drag with two fingers to move around the page.
- With a trackpad or mouse, on Mac or iPad, scroll to move around the page, and hold ⌘ or ⌃ while you scroll to zoom towards the pointer.
- When you open a design, the whole page fits the screen. It fits again when you change the size of the page (see Canvas size). Turning the iPad or resizing the window keeps the zoom you chose.
- Zoom goes from 25% to 800%. When you come within a few percent of 100%, it settles on exactly 100%.
- Fit Width is greyed out when the page is so wide that it would have to be shown smaller than 25%.
- You can type the number with Arabic digits, such as ١٥٠. If what you type is not a number, the zoom stays as it was. The percentage on the bar is shown with Western digits.
- The zoom controls are always on the bar. They are not in the list and cannot be hidden.
- You can also open the list by pressing and holding the status bar, or by right-clicking it on a Mac.
- The items you choose stay the same for all your designs.
- The canvas size has no unit: sizes for social posts are counted in pixels, print sizes in points.
- Typography only tells you that you are typing. The font and its size are in the Text style bar.
- When the window is narrow, the whole bar may not fit. Swipe along it to see the rest.
- On a Mac, the View menu also has Zoom In, Zoom Out and Actual Size.
Keyboard shortcuts
- ⌘+ Zoom In
- ⌘- Zoom Out
- ⌘0 Actual Size