
Canvas and layout
Layers
See every object on the page in one list, so you can pick it, reorder it, lock it or hide it, even when it sits under something else.
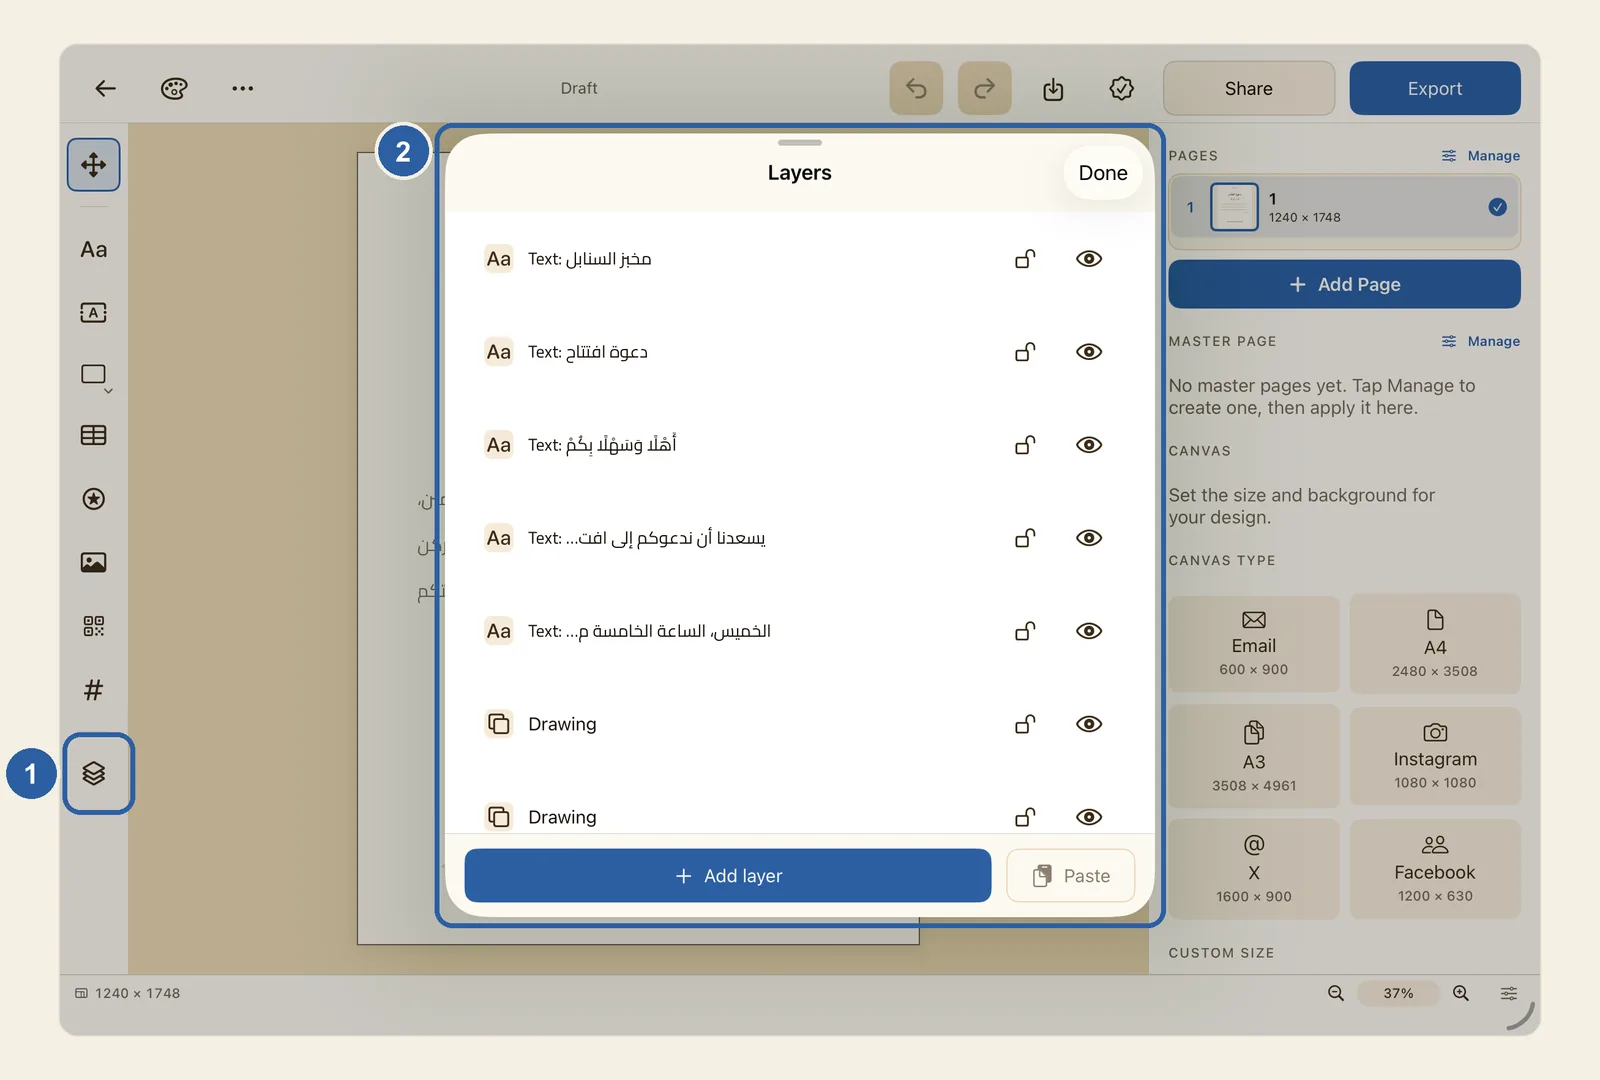
Every object on a page, such as a text box, a picture or a shape, is a layer, and layers are stacked: a background picture at the bottom, with text and stickers on top of it. The Layers panel lists them in that order, so you can reach an object you can't tap on the page.
How to use the Layers panel
Tap Layers, the last button at the bottom of the tool rail, under a short line. It is marked 1 in the picture at the top of this page, and its icon is a stack of layers. The rail runs down the left edge of the editor; when Liwan Studio is in Arabic, it is on the right edge.
The Layers panel opens (2). It lists the objects on the current page, one row each. The object at the front of the page is at the top of the list, and the one at the back is at the bottom.
Each row is named after its content: a text box shows Text: and its first words, a picture Image, a sticker Sticker, a table Table: and its size, a shape Shape: and its name, and a freehand drawing Drawing.
Tap a row to select its object. The row is highlighted, and the object is selected on the page, even when another object covers it. It stays selected after you close the panel, so you can move it or change it in the properties panel.
To change which object sits in front, press and hold a row until it lifts, then drag it up or down the list and let go. A row higher in the list is in front of the rows below it. For example, drag a text row above a picture row so the text shows on top of the picture.
Use the two buttons at the end of each row:
- The padlock (Lock) locks the object. The padlock closes, and the object can no longer be tapped or dragged on the page, so a finished background can't move by accident. ⌘A leaves it out too. Tap the padlock again (Unlock) to free it.
- The eye (Hide) hides the object. The eye gets a line through it and the row's name turns grey. A hidden object is not drawn on the page or in anything you export. Tap the eye again (Show) to bring it back.
When you have finished, tap Done at the top of the panel.
Tips
- Use the panel to reach an object you can't tap on the page: a shape behind a picture, or anything locked or hidden.
- Press and hold a row without dragging it (right-click on a Mac) for Copy, Duplicate and Delete. Duplicate puts an unlocked copy just in front of the original, a little down and to the right. A text box linked to another one also offers Remove Link — see Frame Link.
- Add layer, at the bottom of the panel, adds a Text, Image, Shape or Sticker object in the middle of the page, in front of everything else. Image starts with a placeholder picture that you then replace — see Add and adjust pictures.
- Paste, next to Add layer, puts the objects you copied onto the current page. It is greyed out until you copy something.
- A lock only guards against stray taps and drags on the page. If you select a locked object from the Layers panel, you can still resize it, change it in the properties panel or delete it.
- Text that wraps around a hidden object flows back as if the object were not there — see Text Wrap.
- Tapping a row selects only that object. To select several, see Work with several objects at once.
- Row names come from the content; you can't rename a row.
- The panel lists the current page only. In a Facing Pages design, a line at the top of the panel names the page and its side of the spread. While you edit a master page, the panel lists the master page's objects — see Master Pages.
- Every change you make in the panel can be reversed with Undo.
- There is no single command that sends an object straight to the front or the back. Drag its row in the panel instead, or move it one step at a time — see Order, lock and hide objects.