
Text and fonts
Text Wrap
Make paragraph text flow around a photo, shape or sticker instead of running underneath it.
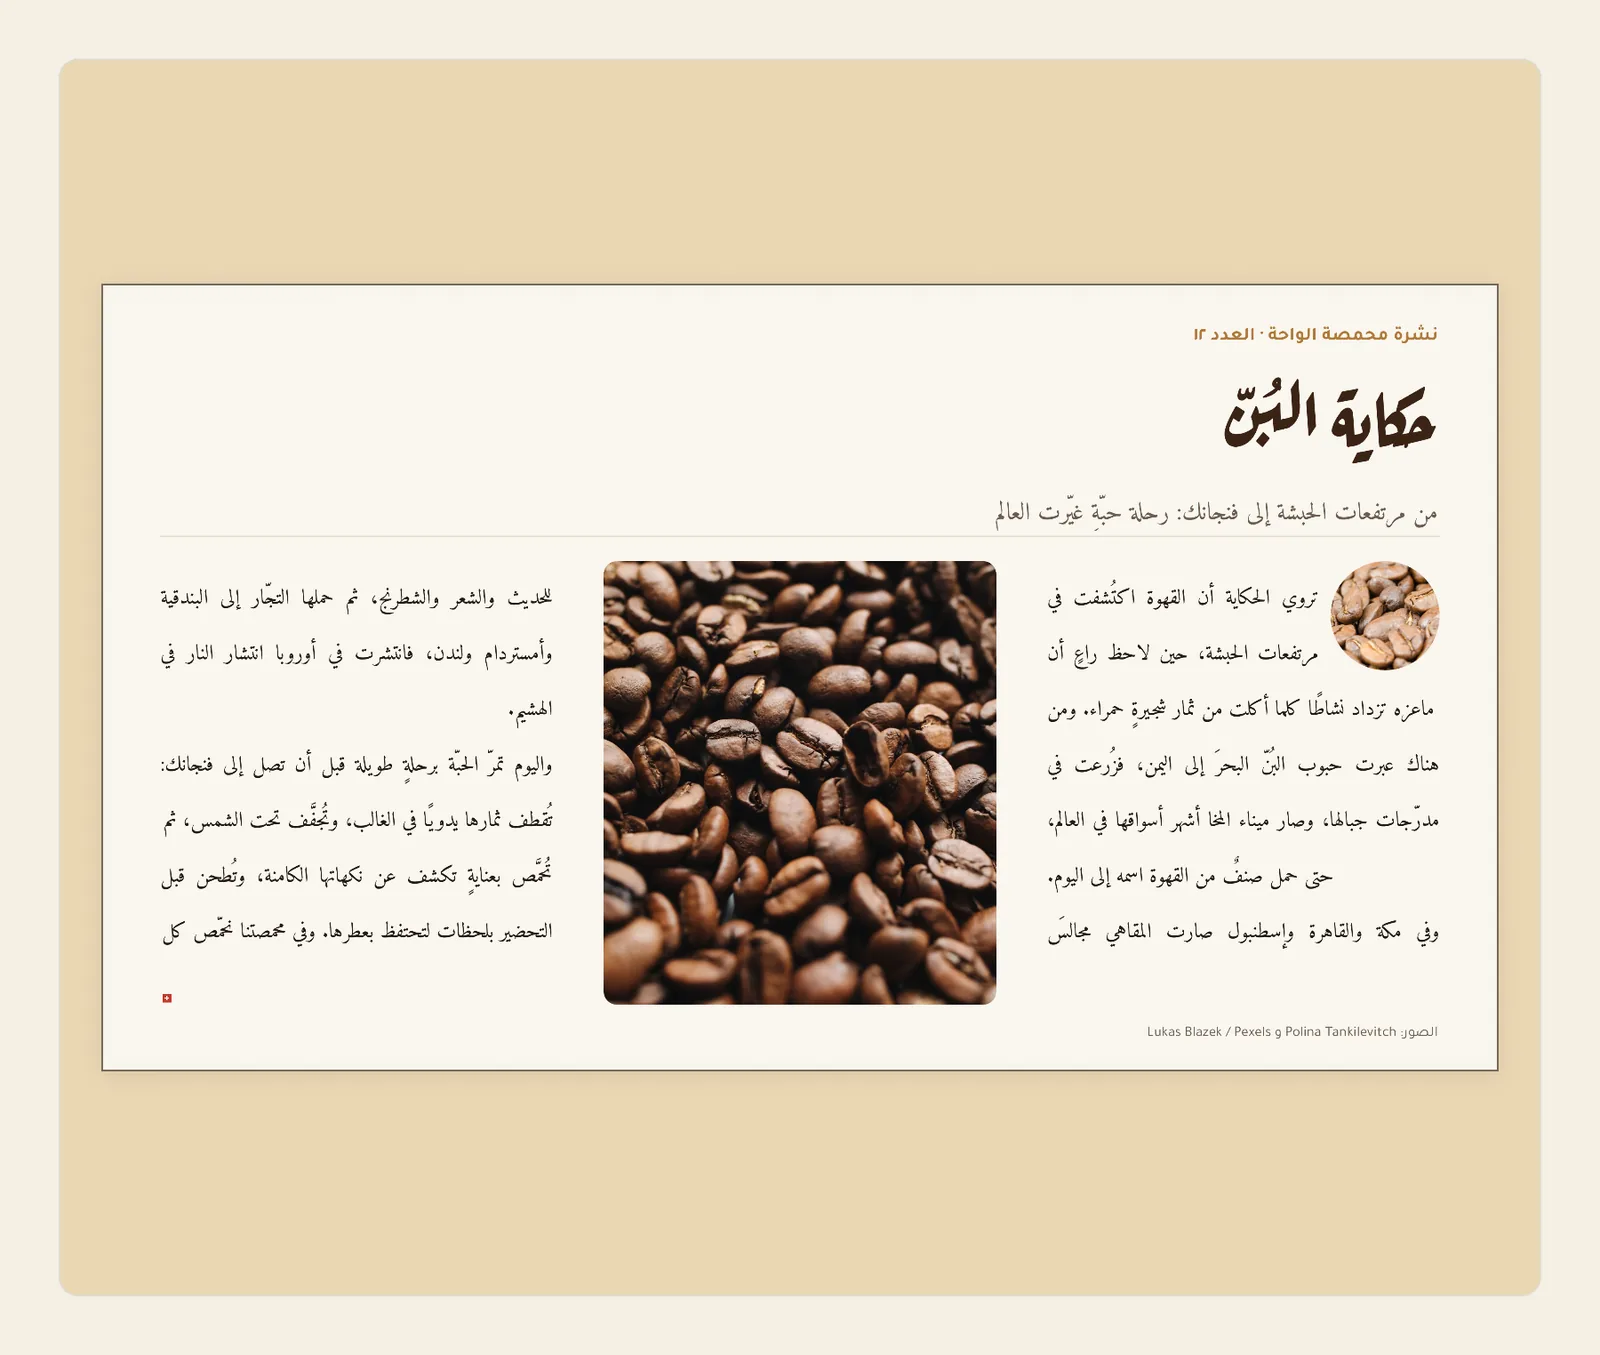
When a photo and a paragraph overlap, one simply sits on top of the other. With Text Wrap, the lines of the paragraph make room for the object and carry on beside and below it, the way text runs around a picture in a magazine. You turn it on for the object, not for the text: every paragraph box the object overlaps makes way for it.
How to wrap text around an object
Tap the photo, shape or other object that the text should flow around. Then drag it onto the paragraph box, to the place where you want the gap in the text. The text only makes way where the object overlaps the box.
If the paragraph box lies on top of the object and your tap selects the text instead, pick the object in the Layers panel.
Make sure the panel beside the page shows the Item tab, the first tab in the row near the top of the panel. Selecting a photo or a shape usually opens it. If another tab is showing, tap Item, or tap Item (Box), the four-arrows button at the top of the tool rail. With a keyboard, you can press V instead, as long as you are not typing in a text box.
If the Item tab is already showing, don't tap Item (Box) again: that switches back to the object's own settings.
Scroll down to Advanced, the last section of the Item tab. Text Wrap is the first setting in it. If the section is folded away, tap the Advanced heading to open it.
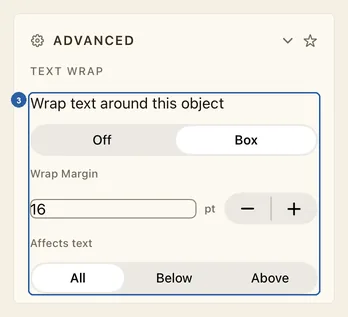
The settings marked 3 belong to a selected photo with wrap turned on. Under Wrap text around this object, a photo offers Off and Box. A shape offers Contour as well.
If there is no Text Wrap, you have selected a text box. A text box can't push other text aside, so select the photo or shape instead.
Tap Box or Contour. The text in every paragraph box that the object overlaps moves aside straight away.
- Box keeps the text clear of the rectangle around the object, even when the photo itself is round or has rounded corners. In the picture at the top of this page, the small round photo of coffee beans uses Box: the first lines of the story stop short of it, and the lines below it run the full width of the box.
- Contour, for shapes and drawings only, makes the text follow the shape's own outline, so the lines follow the curve of a circle or the points of a star.
Once wrap is on, Wrap Margin and Affects text appear below. To stop the text flowing around the object, tap Off.
Under Wrap Margin, set the gap between the object and the text, in points. Type a number in the box and press Return, or tap the − and + buttons after pt to change the gap 2 points at a time. A new object starts at 12 pt; the photo in the picture uses 16 pt. At 0, the text runs right up to the edge of the object.
The margin belongs to the object, so each object that pushes text aside can have its own.
Tips
- Affects text decides which paragraph boxes make way, by their place in the stack of objects. All, where it starts, moves every paragraph box the object overlaps. Below moves only the boxes behind the object, lower in the Layers list. Above moves only the boxes in front of it. For example, if you put a caption box on top of a photo, choose Below for the photo: the story behind it still flows around the photo, and the caption stays on it.
- To keep one paragraph box from making way, select it, open the Text tab, and under Content turn on Ignore Text Wrap, at the end of the Text Box group after Columns. That box then ignores every object, while other paragraph boxes still flow around them.
- Only text in a paragraph box, the kind you make with Paragraph Text, makes way. A headline made with Artistic Text, text on a path, and text inside a shape or a table stay where they are, and the object can cover them. To let a headline flow around a photo, tap Convert to Paragraph Frame in its Text tab — see Add and edit text.
- Text Wrap is offered for photos, QR codes, shapes, drawings, stickers and tables, but not for text boxes. Contour is offered only for shapes and drawings. Everything else uses Box, including a photo whose background you removed: the text keeps clear of the whole picture box, not the outline of the person or product.
- When an object sits in the middle of a paragraph box, the text fills the space on both sides of it, and each line carries on across the object. To keep every line in one piece, place the object against one side of the box.
- With Box, a tilted object pushes the text away from the upright rectangle that holds it, so the text doesn't fill the corners beside it. A tilted shape set to Contour keeps the text along its real outline.
- If the object has a border set to Outside or Center, the text keeps clear of the whole border too — see Add a border.
- Flowing around an object takes the text more lines. If the end of the text disappears and a small red mark appears at the bottom corner of the box, make the box taller, lower the margin, or link the box to another one so the text continues there — see Frame Link. In linked boxes, each box makes way for the objects it overlaps, and the lines pushed out of one box carry on in the next.
- In a box with columns, an object moves the text only in the columns it reaches. While an object pushes text aside in that box, Balance columns has no effect and the columns fill one after another. See Columns.
- An object with Text Wrap on a master page pushes aside the paragraph text on the pages that use that master, as long as its Affects text is All or Above — see Master Pages.
- A hidden object stops pushing text aside, and the text flows back into its place — see Order, lock and hide objects.
- With several objects selected, Text Wrap isn't offered. Set it on each object in turn.
- To jump to the setting, type "wrap" in Search properties at the top of the panel, then tap Text Wrap in the results.
- Each change here is one undo step — see Undo and redo.
- In Split View or a narrow window on iPad, the panel is hidden to leave room for the page. Tap Item (Box) at the top of the tool rail to open it.