
Canvas and layout
Canvas size
Set the page to the size you need — a post, a flyer, an A4 sheet — and give it a colour, gradient or photo background.
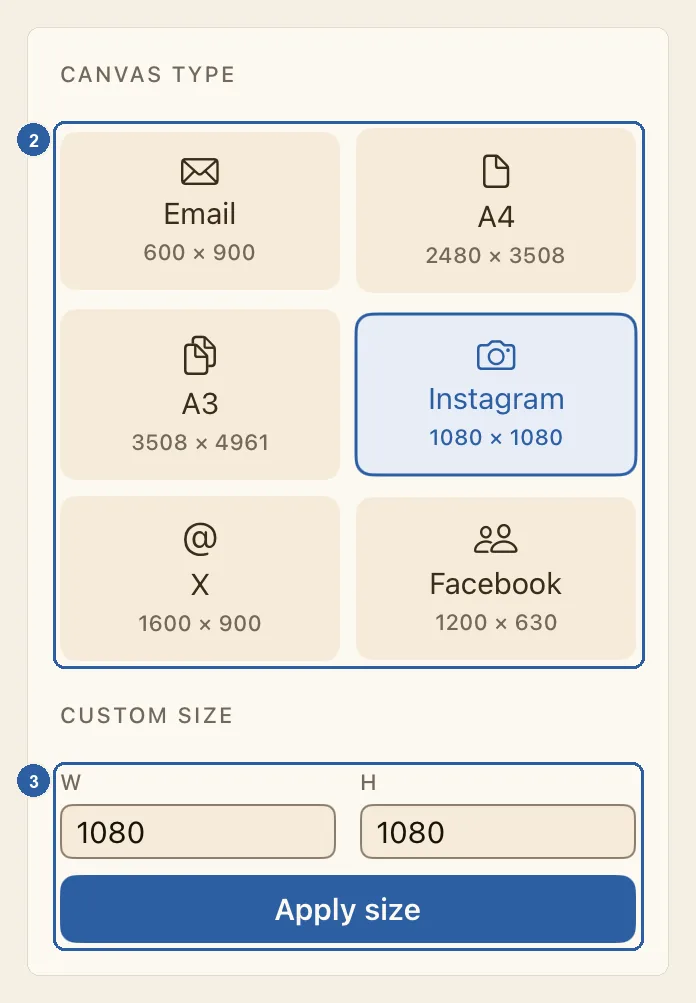
Both settings are in the Canvas section of the properties panel. This section appears when nothing on the page is selected. They belong to the page you are on, so each page of a menu or booklet can have its own size and background.
How to set the canvas size and background
Tap an empty part of the page so that nothing is selected. If you are not typing in a text box, you can also press Esc on a keyboard.
The properties panel now shows your pages at the top, and the Canvas section below them.
Under Canvas type, tap a ready size. These tiles are marked 2 in the picture at the top of this page. Each tile shows its size under its name, and the tile that matches the page's current size is highlighted:
- Email: 600 × 900
- A4: 2480 × 3508, an A4 sheet at 300 dots per inch, for print
- A3: 3508 × 4961, an A3 sheet at 300 dots per inch
- Instagram: 1080 × 1080
- X: 1600 × 900
- Facebook: 1200 × 630
To use your own size, go to Custom size just below the tiles, marked 3 in the same picture. Type the width in W and the height in H, then tap Apply size. The page changes size straight away.
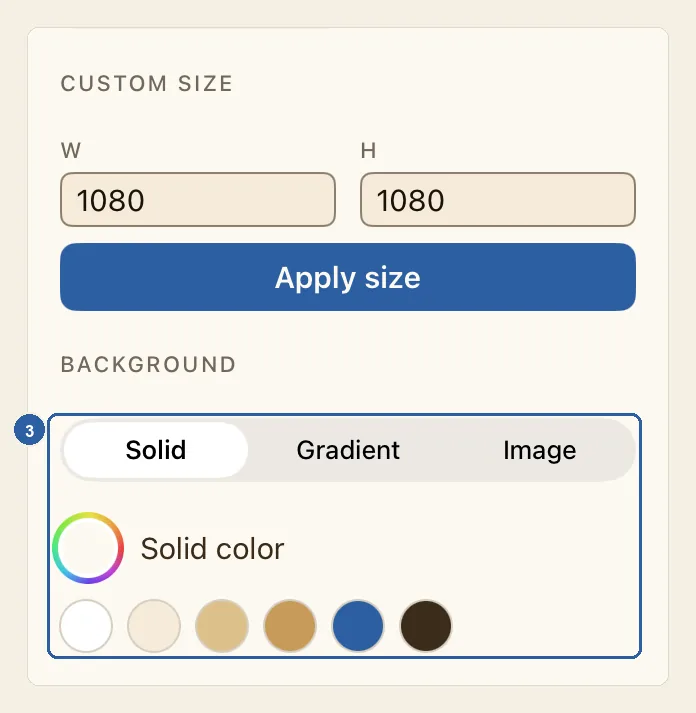
Further down, under Background, tap Solid for a plain colour. Then tap one of the six colour circles, or tap the round button with the rainbow ring, next to Solid color, to pick any colour you like.
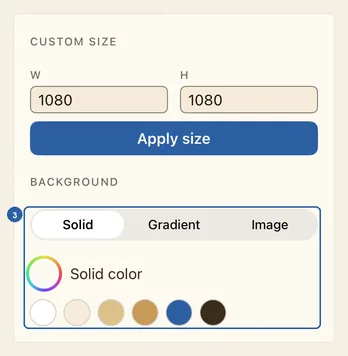
For a gradient or a photo, tap Gradient or Image instead.
- Gradient fades the page from one colour to another. A new gradient starts with the page's current colour and ends in blue. Tap the two round colour buttons next to Colors to change the first and the second colour, and drag the Angle slider to turn the direction of the fade.
- Image: tap Choose image and pick a photo. Nothing changes on the page until you do. The photo covers the whole page, and any part that does not fit is cropped. Drag Opacity to fade it, tap Replace Image to pick another photo, or tap Remove image to take it away.
Tips
- Changing the size in the Canvas section does not move your objects. They keep their size and their place measured from the top-left corner, so on a smaller page, objects near the right or bottom edge can end up off the page. Watch for this in Arabic designs, where the content usually starts at the right.
- To make the objects follow the new shape, tap the … button (Document) in the top bar and choose Canvas size instead. Tap Instagram square, Instagram portrait, Story / TikTok, LinkedIn or X post, or type a Width and Height under Custom and tap Apply custom size. Each object then moves and resizes to keep its place on the new page. For more choices, such as scaling everything to fit inside the page, see Resize canvas.
- In Custom size, each side can be from 64 to 10,000. A number outside that range is changed to the nearest limit when you tap Apply size. Typing a number changes nothing until you tap the button.
- Lowering a photo's Opacity fades it toward the page's solid colour, which can make text on top easier to read. To choose that colour, set it with Solid first, then switch to Image and pick the photo.
- Switching from Image to Solid or Gradient removes the photo, and switching from Gradient to Solid removes the gradient. If you did not mean to, undo brings it back.
- On a Mac, Choose image opens a window for picking an image file on your Mac, not your photo library. If Couldn’t add photo appears, the file could not be read; try a JPEG or PNG instead.
- A page made with Add Page gets the same size and solid colour as the page you are on, but not its gradient or photo. Duplicate a page to copy those too — see Pages.
- In Split View or a narrow window on iPad, the properties panel is hidden to leave room for the page. Tap Item (Box) at the top of the tool rail to open it.
- While you edit a master page, the Canvas section is replaced by a short note: a master page has no size or background of its own. See Master Pages.
- Below Background, Print & bleed records the bleed and safe margin that Preflight checks before you print. See Print & bleed.