
Canvas and layout
Work with several objects at once
Select several objects to move them together, line them up, or change their colour and opacity in one go.
Useful when every price on a menu should change colour, or a group of decorations should fade a little, without editing each one in turn.
How to work with several objects
Select the objects. Hold ⇧ (Shift) and tap each one you want; Shift-tap a selected object again to leave it out. To select everything on the current page, press ⌘A.
Both need a keyboard, so on iPad connect a hardware keyboard first. Without one, a two-finger tap opens the object's menu instead of adding the object to the selection.
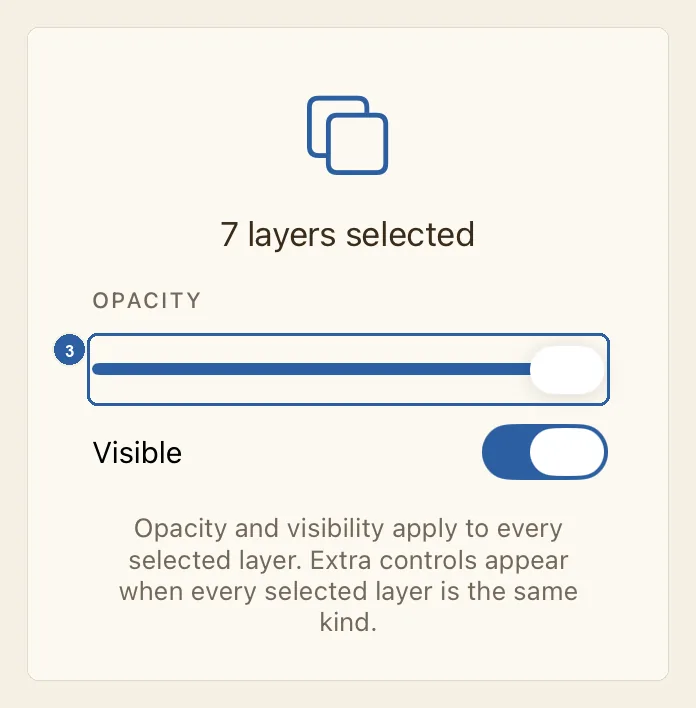
The properties panel beside the page now shows how many objects you selected, for example "7 layers selected". The status bar at the bottom of the editor shows the count too, such as "7 selected".
While they are selected, drag any one of them to move them all together.
Drag the Opacity slider to make all the selected objects more or less see-through at once. Turn off Visible to hide them all, and turn it on again to bring them back.
When every selected object is a shape, or every one is a text box, more controls appear under Visible:
- All shapes: tap the colour swatch next to Fill color to give them all the same fill.
- All text boxes: tap the swatch next to Color, under Text Color, to give them all the same text colour. Under Alignment, tap Start, Center or End to align the text inside every box the same way. Start is the right side for Arabic text and the left side for English text.
When the selection mixes kinds, you only get Opacity and Visible, and a note under them says so.
To line up the objects themselves rather than the text inside them, use Align Left, Align Right, Align Top or Align Bottom — from the keyboard (the keys are listed on this page) or from the Arrange menu on a Mac.
Tips
- To clear the selection, tap an empty part of the page or press Esc.
- ⌘A selects objects only while Item (Box), the four-arrows button at the top of the tool rail, is highlighted. If it isn't, tap it or press V, then try again. While you are typing in a text box, ⌘A selects the text, not the objects.
- Locked and hidden objects can't be picked on the page, and ⌘A leaves them out. Reach them from the Layers panel.
- The Opacity slider starts at the value of one of the selected objects. Once you move it, they all take that same value, even if they were different before.
- Each change in this panel counts as one step, so a single undo puts all the objects back.
- The resize and rotate handles work only when a single object is selected, so size, rotation and exact X and Y values are set one object at a time.
- Objects dragged together don't snap to the alignment guides. On a Mac, the arrow keys move all the selected objects: 1 point at a time, or 10 with ⇧.
- ⌘C, ⌘X, ⌘V, ⌘D and the ⌫ key work on every selected object — see Copy, paste and duplicate. The object menu (a two-finger tap on iPad, a right-click on Mac) is different: it acts only on the object you opened it on, and leaves just that one selected.
- If the selection includes photos that still have their background, a button such as "Remove Background (3 images)" appears under the count. It removes the background from all of them — see Remove Background.
- Select exactly one artistic text box and one shape, and the panel offers to attach the text to the shape's outline instead — see Text on Path.
Keyboard shortcuts
- ⌘A Select All
- ⌃⌘← Align Left
- ⌃⌘→ Align Right
- ⌃⌘↑ Align Top
- ⌃⌘↓ Align Bottom