
Pictures and graphics
Customize Image
Edit a photo on a page of its own — crop it, fix its light and colour, add a filter, remove its background — then put it in your design in one step.
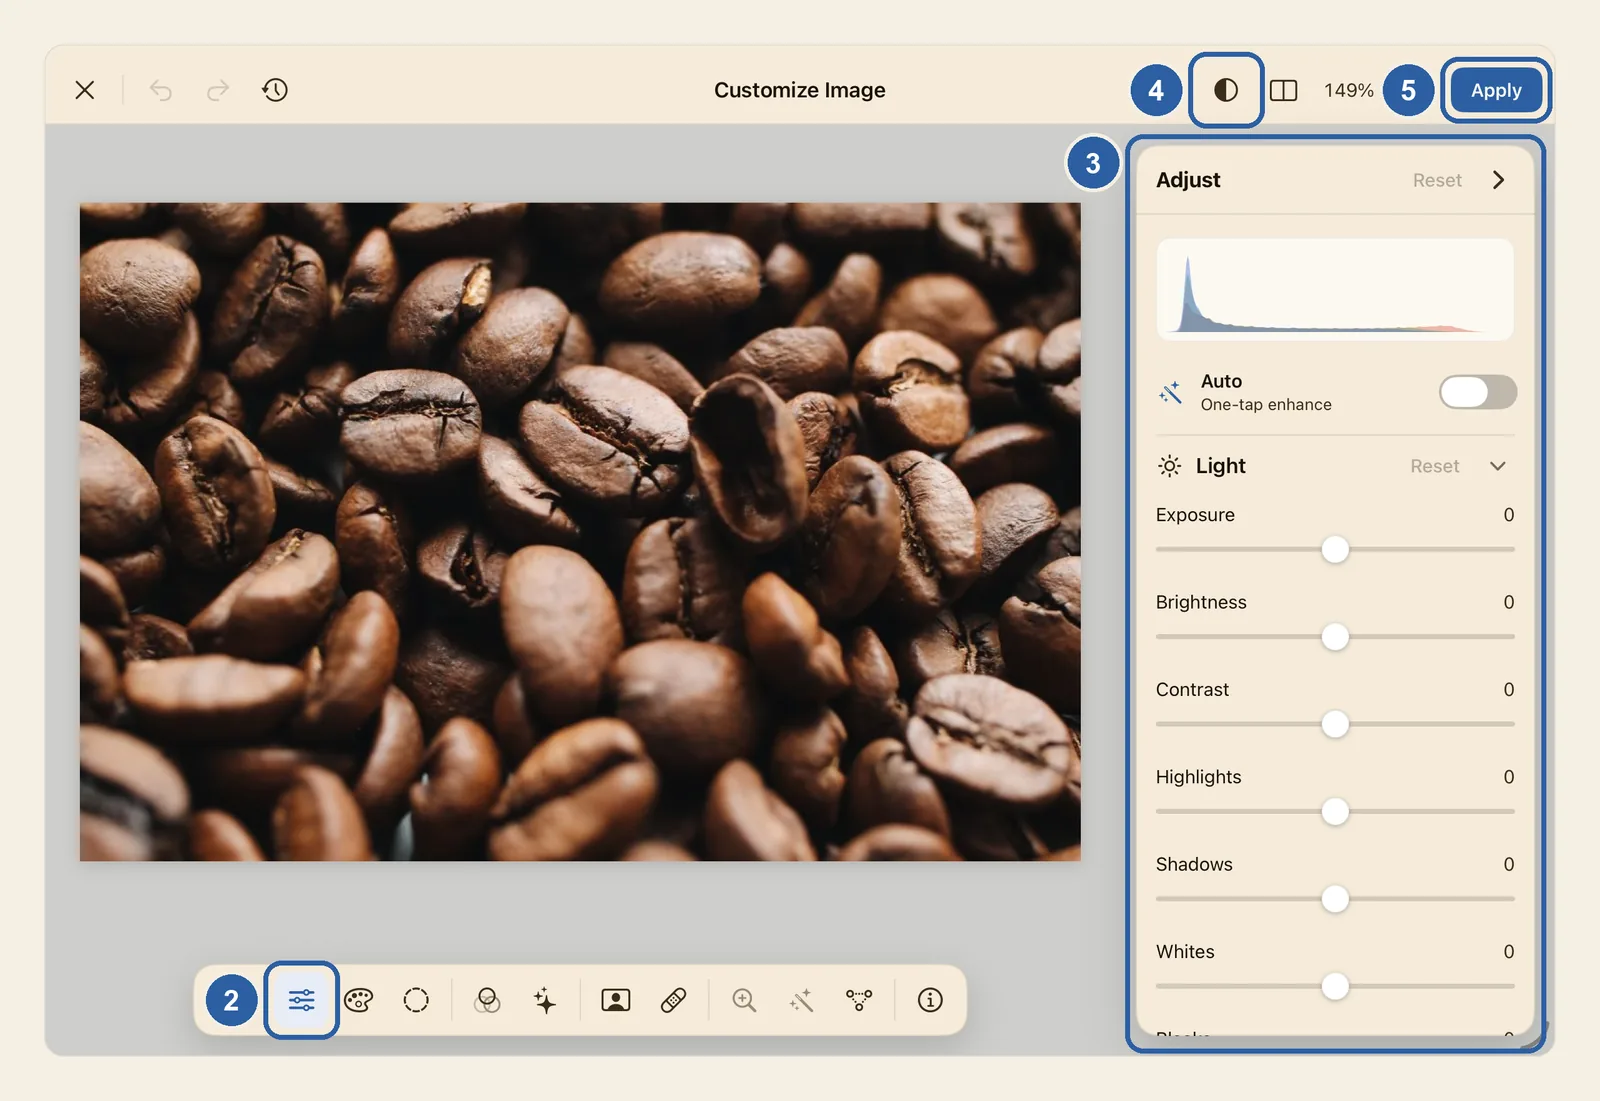
Customize Image opens a picture on a page that fills the window, with every photo tool in one place. Nothing in your design changes until you tap Apply, so you can try things out freely, and Liwan Studio always keeps your original photo.
How to customize a picture
Double-tap the picture on the page. The Customize Image page opens, with your photo in the middle.
You can also select the picture, tap Image in the row of tabs at the top of the properties panel, then tap the blue Customize Image card at the top of that tab. Under its name, the card sums up what you have already done to the picture, such as Cropped.
Along the bottom of the page, the dock holds twelve categories of tools: Crop, Adjust, Color, Masks, Filters, Effects, Background, Retouch, Enhance, Restyle, Convert and Info. Tap one, such as Adjust, marked 2 in the picture at the top of this page. When the dock has little room, it shows only the icons, without their names.
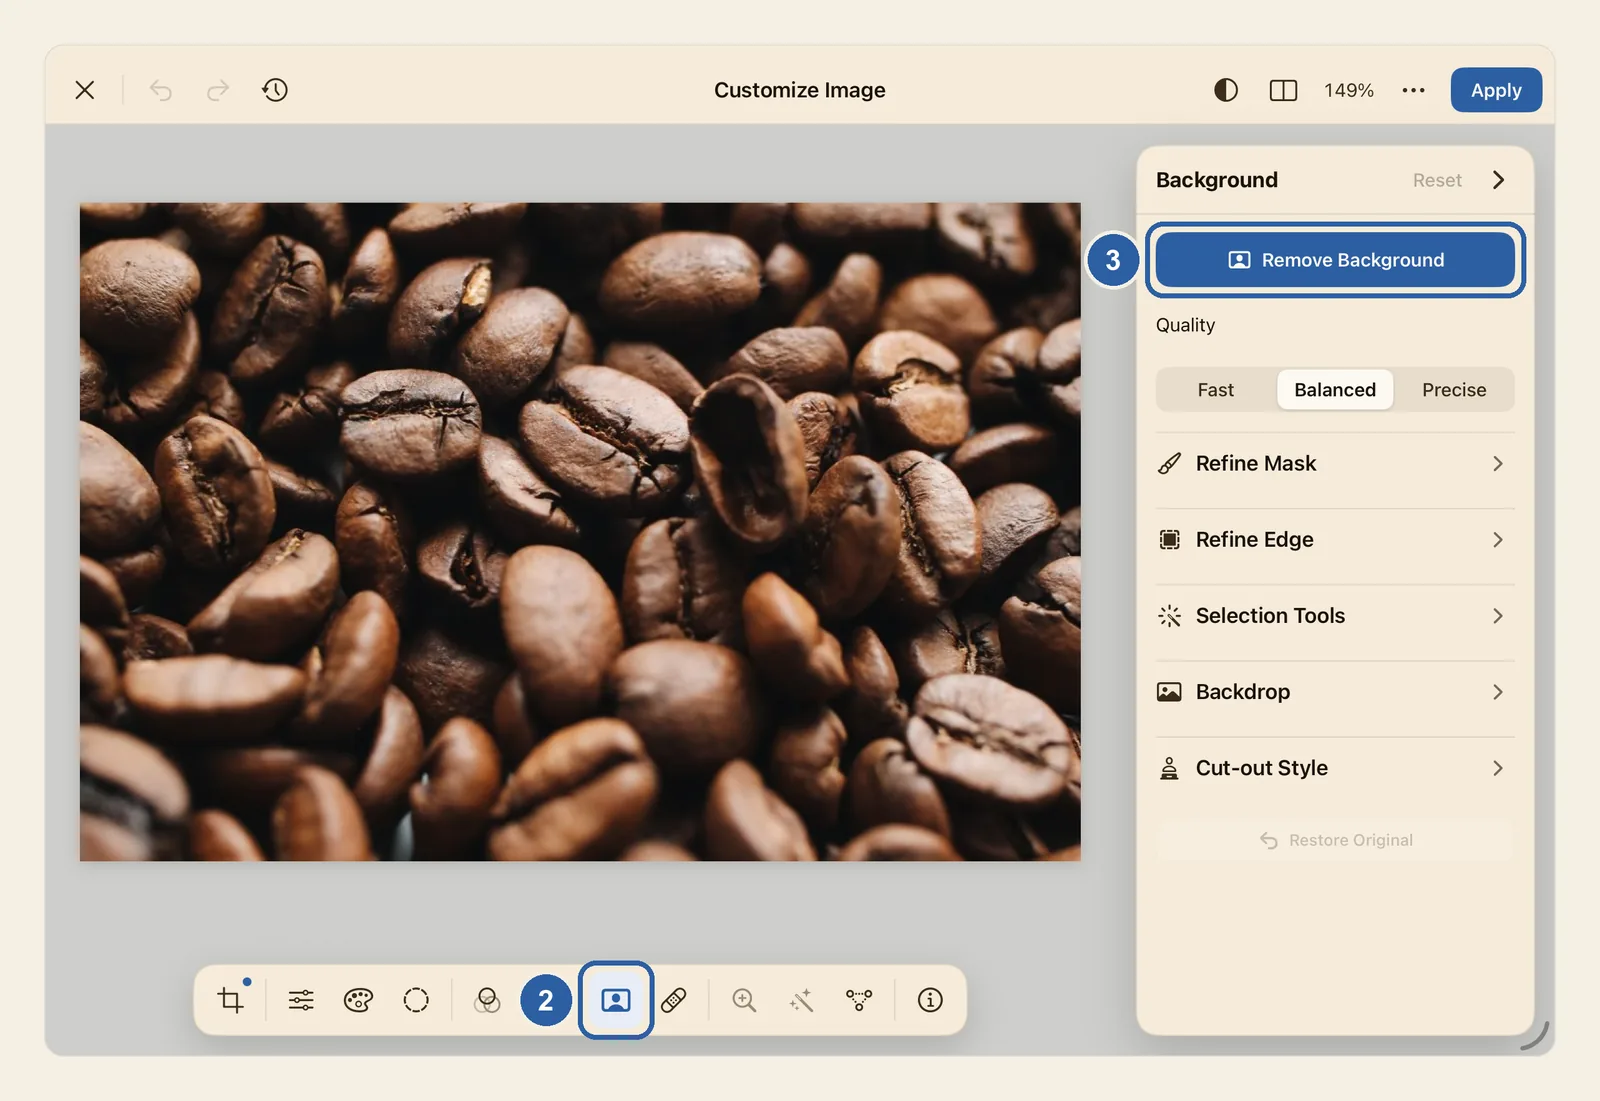
The tools of that category open in a card beside the photo, marked 3, or in a tray under the photo when the window is narrow. In the picture below, Background, marked 2, has opened the Background card, with Remove Background, marked 3, at its top.
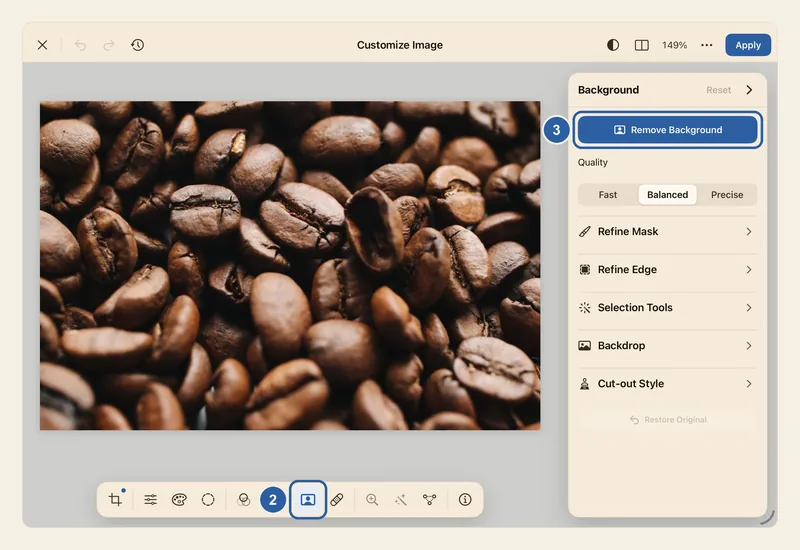
Change the controls in the card, and watch the photo change as you go. What each category is for:
- Crop: frame the photo in its box, choose a shape such as 1:1 or 4:5, turn it, flip it and straighten it.
- Adjust: light and colour, with sliders such as Exposure, Contrast and Saturation, and the Auto switch for a one-tap fix.
- Color: finer colour tools: Tone Curve, Levels, Color Mixer and Color Grading.
- Masks: change only one part of the photo, such as the subject, the sky or a part you paint.
- Filters: ready-made looks in one tap, with an Intensity slider, and the looks you saved, under My Looks.
- Effects: blur, vignette, grain, duotone, light leaks, soft edges, a gradient over the photo and more.
- Background: remove the background and put a colour, a blur or another picture behind the subject. See Remove Background.
- Retouch: remove an unwanted object, heal spots and dust, clone, fix red eyes and smooth skin.
- Enhance: make a small or soft photo four times larger.
- Restyle: turn the photo into an animation, an illustration or a sketch with Image Playground.
- Convert: trace the photo into vector shapes and add them to the page.
- Info: the photo's size in pixels, how sharp it will be in an export or a print, and its camera details.
A small dot on a category in the dock shows that you have changed something in it. Tap the category you are in again to fold its card away and see more of the photo.
To see how far you have come, tap Compare, the half-filled circle marked 4 in the top bar. The photo shows as it was, with an Original badge. Your crop and turns are kept, so you compare the same view. Tap Compare again to go back to your edits, or press and hold it for a quick look.
Split Before / After, the next button, shows the photo before and after side by side, with a divider you can drag.
When you like the result, tap Apply, marked 5, at the end of the top bar. The page closes and the picture in your design changes.
Everything you did on the page counts as one step, so one Undo in the editor takes it all back. See Undo and redo.
Tips
- To leave without changing the picture, tap the close button (×) at the start of the top bar, or press Esc. If you changed something, Liwan Studio asks "Discard changes?": Discard leaves the picture as it was, and Keep Editing takes you back to the page.
- The arrows beside the close button undo and redo each step on the page: each slider you let go, each tap and each brush stroke. History, the clock button, lists every step, newest first, back to Opened. Tap one to go back to it.
- Each card has a Reset at the top that puts its controls back. Reset All, in the More menu (the … button), resets every category.
- Pinch to zoom in on the photo and drag to move around it. The percentage in the top bar opens a menu with Fit, Zoom In and Zoom Out.
- Copy Look and Paste Look, in the More menu, give the colours, filter and effects of one picture to another: copy the look, open the other picture on this page and tap Paste Look. The crop, masks, retouching and a removed background stay with the picture they were made on.
- Save Look…, in the same menu, keeps the look under a name you choose. It then appears under My Looks in Filters, in every design.
- Export Image…, in the More menu, saves the picture alone, at its full size, as a PNG, JPEG, HEIC, TIFF or AVIF file. Its frame, corner radius and drop shadow are left out.
- In a narrow window, History, Compare and Split Before / After move into the More menu.
- With a keyboard, the number keys 1 to 9 open the first nine categories of the dock, in order, and ⌘↩ applies your changes.
- A tool that can't work on this picture stays in the dock, dimmed, and its card says why. A logo imported as SVG has no photo colours to change, so Adjust, Retouch and the other photo tools are dimmed for it. Enhance and Restyle need an iPad or Mac that supports them.
- A shape filled with a picture opens the same page, from the Customize Image card in its Picture section. It has no Background tools.
- When you paste or drop in a picture from another app, the "Picture pasted" message that appears has a Customize button that opens the new picture on this page.
- The frame, opacity, blend mode and drop shadow belong to the picture's box, not to the photo: set them in the Item and Effects tabs of the properties panel. See Add a border and Drop Shadow.
Keyboard shortcuts
- ⌥⌘E Customize Image…