
Pages and print
Facing Pages
Show a booklet's pages side by side in pairs, as two-page spreads, and design both pages of a spread at once.
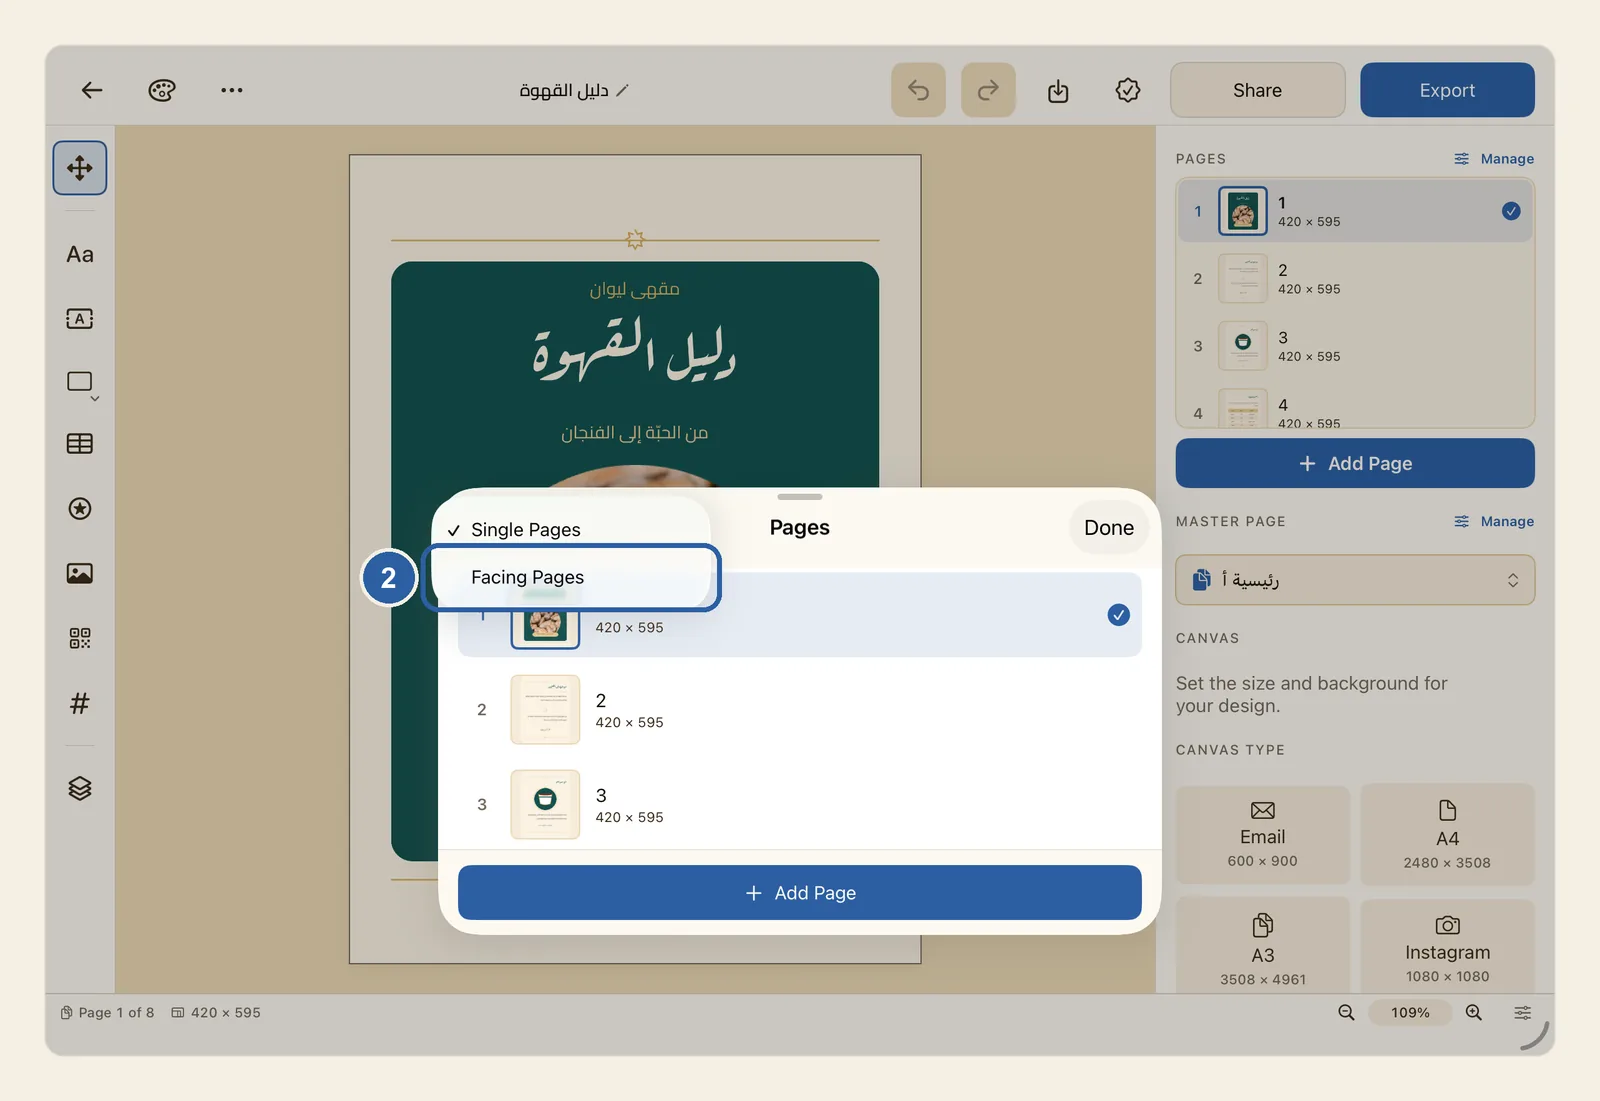
A spread is the pair of pages you see together when a booklet or a folded menu lies open. Facing Pages shows your design that way while you work. It changes only how the pages are shown, not the pages themselves or what you export.
How to show pages as spreads
Tap an empty part of the page so that nothing is selected. At the top of the properties panel, tap Manage next to Pages.
The Pages panel opens, with every page of the design listed one under another.
Tap the button with a page icon at the top left of the panel (top right when Liwan Studio is in Arabic). A short menu opens with Single Pages and Facing Pages: choose Facing Pages, marked 2 in the picture at the top of this page.
The button's icon turns into a book, and the list now shows the pages in pairs. Page 1 stands alone on the right, next to an empty dashed outline, because it is the cover. Then come pages 2 and 3, pages 4 and 5, and so on. If the design has an even number of pages, the last page stands alone too.
Tap Done at the top of the panel to close it. If you want to start on a particular spread, tap one of its pages in the list first.
The editor now shows the spread that holds the current page: two pages side by side, with a grey gap between them and the lower page number on the left. Select and edit objects on either page as usual. To move an object to the facing page, drag it across the gap: once its centre crosses the middle of the gap, it belongs to the other page.
If the current page is page 1, it still shows on its own, because it is the cover. To go to another spread, tap one of its pages in the Pages section of the properties panel, or open the Pages panel again.
Tips
- Facing Pages changes only what you see while you design. Each page is still a page of its own: a PDF has one page for every page of the design, not one per spread, and PNG and JPEG save only the current page. See Export.
- Every object belongs to one page. If a picture or shape reaches across the gap, you see it whole in the spread, but the part over the facing page is not on that page: each page is exported on its own, and anything past its edge is cut off.
- Tapping an object on either page makes its page the current one, so the properties panel and the Layers panel work on that page. A line at the top of the Layers panel names the page and says whether it is the left or the right page of the spread.
- You can't drag pages to reorder them while the list shows spreads. Switch back to Single Pages, reorder, then switch again. Pressing and holding a page in a spread (right-click on a Mac) opens the same menu as in Single Pages, with Insert Page After This, Duplicate and Delete. See Pages.
- The editor always lays out a spread like a book bound on the left, as English books are: page 2 on the left, page 3 on the right. A booklet bound on the right, as Arabic booklets usually are, has them the other way round, so a picture you spread across pages 2 and 3 would come out with its halves swapped. Check the page order with your print shop before you design across two pages.
- While you edit a master page, it shows on its own, not as a spread. See Master Pages.
- The choice is saved with the design. To go back to one page at a time, choose Single Pages in the same menu. Switching can be undone like any other change. See Undo and redo.