
Text and fonts
Frame Link
Link two or more text boxes so a long text that does not fit in the first carries on in the next, like an article in a newsletter.
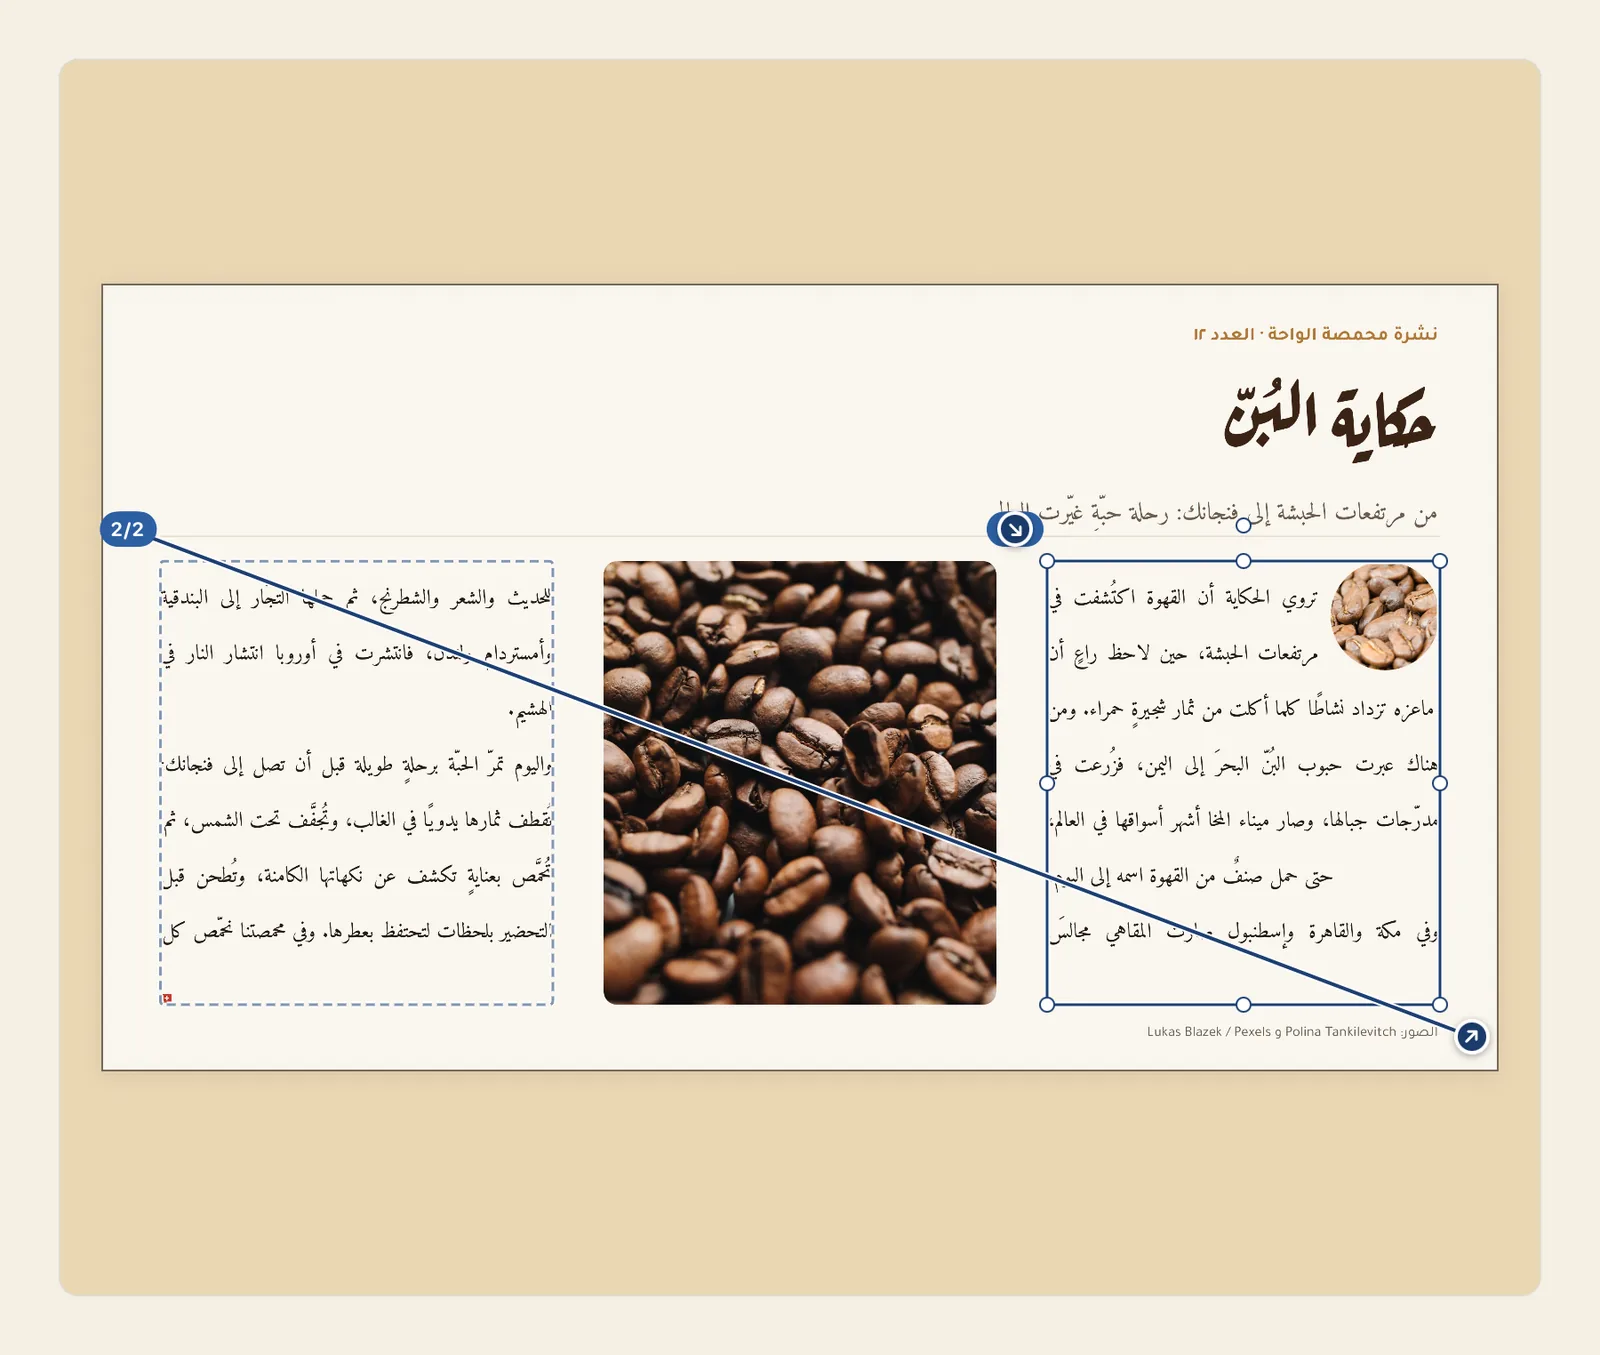
Linked boxes share one text. When the first box is full, the rest of the text moves on into the next box, and if that one fills up too, into the one after it. Use it when an article has to run around a photo, or across boxes of different sizes on the same page.
How to link text boxes
Make two paragraph boxes on the same page with Paragraph Text in the tool rail: the box where the text starts, and the box where it should carry on. Put each one where you want it. See Add and edit text.
Type or paste the whole text into the first box. Leave the second box empty: when you link the boxes, anything already in it is replaced. For now, the text that does not fit in the first box is hidden, and a small red mark appears in a bottom corner of the box.
On iPad, each new box appears in the middle of the screen. Tap Item (Box), the four-arrows button at the top of the tool rail, to stop typing, then drag the box into place.
Tap the first box. This puts the cursor in the text, so tap Item (Box) to stop typing. The box stays selected.
Two small round blue buttons appear just outside the box: one beyond its top-left corner, and one beyond its bottom-right corner with an arrow pointing up and to the right. They sit at these corners whatever the language of the text. The bottom-right one is the output port, where the text leaves the box. When the text does not fit, the output port is red, and a red label under it says "Text continues beyond the available frames".
Drag from the output port to the second box. A dashed line follows your finger, and an outline appears around the box when you are over it. Let go anywhere inside the second box.
The picture at the top of this page shows the result: a line runs from the output port of the first box to the top-left corner of the second box, which now carries the badge 2/2.
The text that did not fit in the first box now continues in the second, from where the first box ends. If it is still too long for both boxes, the red mark moves to the second box.
While one of the linked boxes is selected, Liwan Studio shows how they connect: a line from each box to the next, a small badge by the top-left corner of each box with its place in the order, such as 2/2 (on the selected box, the round button at that corner covers the badge), and a dashed outline around the linked boxes that are not selected. These marks only guide you on the screen. They do not appear when you export.
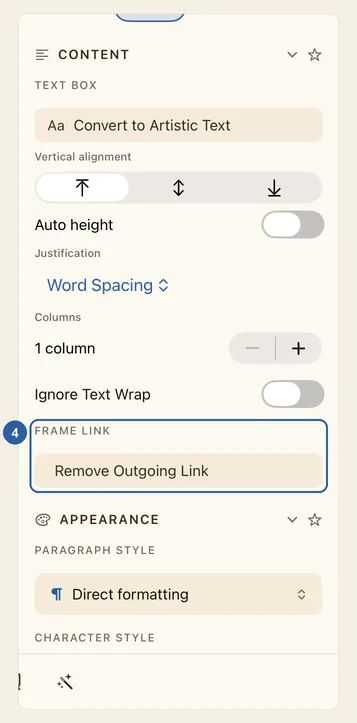
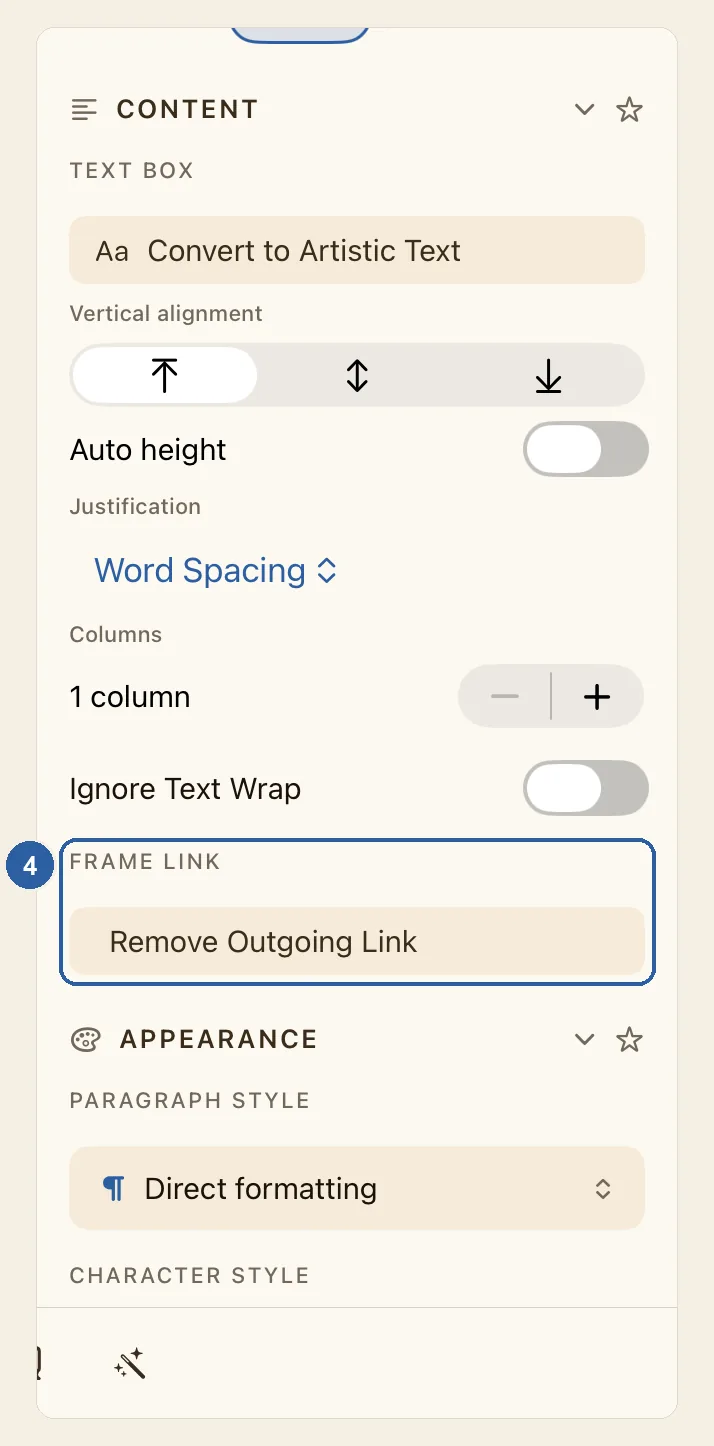
To see the link in the panel beside the page, tap Text at the top of the panel. A Frame Link section, marked 4 in the picture, appears at the end of Content, just above Appearance. For the first box it holds Remove Outgoing Link. Select the second box and it shows Remove Incoming Link instead. A box that is not linked has no Frame Link section.
Tips
- To carry on into a third box, select the last box of the chain and drag its output port onto the new box. You can link as many boxes as you need; the badges then read 1/3, 2/3, 3/3, and so on.
- All the linked boxes must be on the same page. A text cannot carry on onto another page.
- Only paragraph boxes can be linked. A headline made with Artistic Text has no ports: select it, and in the Text panel, under Text Box, tap Convert to Paragraph Frame first. Text on a path cannot be linked.
- Each box takes text from one box only and passes it on to one box only. If you let go over a box that already continues another text, or anywhere outside a paragraph box, nothing changes.
- You can edit the text in any of the linked boxes: tap into it and type. Adding or removing words, or resizing a box, moves the rest of the text along through the boxes after it.
- Each linked box keeps its own size and place on the page, and can have its own Columns.
- To send the text to a different box, drag the output port of a linked box onto that box. The boxes that came after it are cut off from it and left empty.
- To unlink, select a box and, under Frame Link, tap Remove Outgoing Link to cut the link to the next box, or Remove Incoming Link to cut the link from the box before it. The text goes back into the boxes before the cut, and the boxes after it are left empty.
- In the Layers panel, press and hold the row of a linked box (right-click on a Mac) and choose Remove Link to cut both of its links at once. The text stays in the boxes before it; that box and the ones after it are left empty.
- Deleting a linked box does not delete the text. The boxes before and after it are joined, and the text flows on through the boxes that remain.
- When the last box still cannot hold all the text, link another box, make the boxes bigger, or make the text smaller. The red mark and the red port only show on the screen, never in what you export. See Troubleshooting.
- Linking and unlinking can both be undone. See Undo and redo.
- A shape that holds text is linked from its own panel instead: select the shape, open the Shape tab, and under Linked Container tap Flow text into…, then choose the other shape. See Shapes.
- On a Mac, click where these steps say tap, and drag the output port with the pointer.